Pages

Tuesday, May 17, 2016

Our Camping Routing

Ah, the great outdoors.  They are great, right?  No cell reception, kids covered from head to toe in dirt, and a chance to just be.  Let's not forget the campfire and s'mores.  It's great.

If you're like me, you spend a good amount of time planning for a camping trip.  And most of the planning centers around the food we'll eat.  I don't like most pre-packaged food, so I try not to rely on it when camping - even though it would make things much easier.  It's not all about healthfulness - I mean we have our camping junk food staples...plenty of them. But, I like to eat things that taste and resemble food.  So the trick is to find easy ways to eat really well while camping.  Enough with the foil packets.  I don't want undercooked potatoes with my chicken breast steamed on top.  Sorry.  I don't find that to be much easier, anyway. So, my goal with camping food is for it to be tasty, easy to prepare and easy to clean up after.

Dinner -

The best tip for dinner than I can give you is to buy meat, marinate it, and freeze it.  It will slowly thaw in the cooler, while the meat marinates and will be ready to grill over the campfire.  Or just buy a steak and season with salt and pepper before you throw it on the grill.  You'll save yourself a lot of time and energy when it comes to dishes.  You can adapt almost any grill recipe for this.  Here are some that I like to use camping:

Cumin Ancho Chicken -  This will work great for tacos or nachos around the campfire.

Cilantro Thai Grilled Chicken - serve with a veggie and rice or potatoes.

BBQ Chicken Kebabs -  kids love these.  I usually have the meat cut, marinated and frozen and then skewer them at camp, but I think I'll try freezing them on the skewers next time.

Tri-tip - rub thawed tri-tip with salt, pepper and herbes du provence and grill.

This last trip we used the pre-marinated Bool Kogi from Trader Joe's.  It thawed nicely and because it is cut thin cooked pretty quickly

Another idea is skillet dinners - especially on a long trip.  I love my campfire, but cooking over the grill can take a while and sometimes it's just nice to pop out something of a one-skillet dinner.  Try this 15-minute Lasagne

Side Dishes -

I am ok with grilling veggies in packets.  We often steam vegetables at home, so a little steamed broccoli is just fine.  I would chop and prep the veggies at home first or consider using frozen peas or corn.  I also like to bring a hearty salad that is ok a little wilty - something made with cabbage is a good start.

Roasted Broccoli Toss 1 head broccoli florets, 2 sliced garlic cloves, 1 tablespoon olive oil, 1/4 teaspoon red pepper flakes, and salt on a sheet of foil. Arrange in a single layer and form a packet. Grill over medium-high heat, 10 minutes.

Salt-Roasted Potatoes Combine 2 cups kosher salt and 2 sprigs chopped rosemary on a sheet of foil. Bury 1 1/2 pounds baby potatoes in the salt mixture and form a packet. Grill over medium heat, covered, 45 minutes. (I like to roast these at home and just heat them up on the grill - make extra so you can cook them up with an onion to make home-fries the next morning)
Salads - Buy a bagged mix or make your own with separate dressing packets.  Or choose a hearty salad like bean and corn, kale or broccoli slaw that will keep for a few days without getting soggy.

Breakfast -

It was a tradition for both my husband's family and mine to get the small boxes of junk cereal when we went camping.  So, the tradition has lived on.  My kids really never eat a hot breakfast while camping.  Between junk cereal and those gawd-awful "wax" donuts they're never hungry.  I'm sure your judging me right now, but it's how we camp.  They can have junk food they don't normally get when we're at home.  I often try to do something cooked anyway.  It's best to keep it simple.  Eggs, breakfast sausage (both frozen beforehand), bacon...they're not too hard.

Oatmeal is good and easy to transport - you can bring old fashioned with the fixins or instant.
 
I often do french toast - making the egg mixture in a tupperware that will fit the bread for dipping and then freezing it, but this is certainly not easy.

Breakfast Burritos - fill a large tortilla with scrambled eggs, chopped and cooked bacon, cheese, green onion.  Wrap in foil and freeze.  They can be heated over the campfire (there are lots of recipes for different variations on pinterest)

Home-fries - heat oil in skillet and saute a sliced onion until softened.  Add sliced or chopped cooked potatoes and fry until crispy and browned.

Bacon Corn Hash - I happened to make this recipe the week before we left on our last trip and there was so much leftover I froze it and brought it with us for a simple breakfast.  I think it would be really easy to do this camping - especially if you have everything prepped ahead of time.

Coffee -

This deserves it's own section because I know there are various thoughts on this.  We usually use the old fashioned enameled percolator and, really, there's nothing wrong with it.  I grind the coffee on the coarse setting and ziplock it so we have plenty for the trip.  This last time I brought coffee concentrate, but my husband commented that he likes having a hot cup of coffee in the morning when camping.  Some people bring a french press as an alternative.  You're most likely going to get your best cup of coffee that way, but I worry about it breaking.  Last year I added this collapsable silicone filter cone to our camping coffee routine.  It doesn't take up much space, but only 1 cup of coffee at a time.

Lunch - 

Truthfully, this is the hardest meal for me camping.  I feel like everything requires lots of other items and I always loathe the thought of it.  Sandwiches - lettuce, cheese, mayo, mustard, etc.  Hot dogs - buns, ketchup, mustard, onions, etc.  The ideal meal here is simple and portable - because maybe you want to go on an outing or spend all day at the beach.  I'm still working on an ideal meal here, but I'll sure as heck tell you it's not the shells and cheese we made last time!  Sigh.  One tip I have, however, is to consolidate everything needed for sandwiches together, say into one large tupperware or ziplock bag, so that when it's time to make them you don't have to sort through the cooler to find what you need.

Dessert -

Well, I am a bit of a sweet tooth, so I'll give this it's own title.  S'mores are a given, but you can switch it up by using a Reese's Peanut Butter Cup or a Dark Chocolate Caramel and Black Sea Salt Bar instead of Hershey's.  I usually try to have some milk chocolate and dark chocolate for the crowd.  Another one I enjoy is a cut up banana with chocolate and marshmallows wrapped in foil and cooked in the fire.  Yum.

Equipment - 

 A major pet peeve of mine is water leeking into foods when the ice in the cooler melts.  I suppose I could drain the water off, but I feel like it helps keep everything submerged cold.  I wanted to buy one of these guys, but my husband was skeptical.  This last trip we had too much for our cooler, so I brought along our picnic cooler that has a removable plastic bin.  When things started getting a little wet I put all the things like sandwich meat and marshmallows in the bin and floated it on top.  It was perfect.

I keep a set of stacking drawers for my "kitchen."  While camping I keep a list of the items I need to replace.  When we return I replace them along with clean dish towels, etc.  This is what I keep in the drawers:

Measuring Cups
Scissors
Spatula
Pasta Spoon
Ladle
Wooden Spoons
Serving Spoon
Slotted Spoon
Various Knives
Whisk
Silverware
Can Opener
Trash Bags
Vegetable Oil
Plastic wrap
Alluminum Foil
ziplock bags (quart size)
Dish soap
sponges
oven mits
dish towels
wash rags
bowls
plates
cups
lighters/matches
hand sanitizer
hand soap 
Paper towels
napkins


In a separate container I keep all my pots and pans, a non-stick double-burner griddle, cutting boards (the thin plastic kind), two tubs for washing dishes, citronella candle, and percolator.

Copycat Almond Cashew Coconut Chai KIND Bars


As a birth doula, I rely fairly heavily on bars and other fast forms of caloric intake between double hip squeezes and other means of supporting my clients.  I eyed the Almond Cashew Coconut Chai bar at Starbucks and knew I'd appreciate that gem in my doula bag.  When the time came to consume my bar, I was not disappointed.  

Because my kids generally have an aversion to anything that I have painstakingly prepared for them, and because we are out an about quite a bit, I keep a steady supply for KIND bars on hand for snacks and those moments where I have to trick myself into thinking that it's a somewhat acceptable meal replacement.  I wanted to get this chai KIND bar in my rotation and it looks like I'm not the only one.  I found forums where this was the topic of conversation.  It turns out you can buy them individually at Starbucks with their mark-up or you can purchase a case of 72 from KIND.  I like them, but 72 is a lot to have on hand and my husband would certainly think I flew the cookoo's nest purchasing $100 worth of kind bars in one sitting.  

Did you know you can find almost anything on pinterest?  You can.  I found this little copycat recipe for Almond Coconut KIND bars and compared the "syrup" with other KIND copycat recipes I found.  So I had a good base for adaptation.  Chai spice was a little more tricky.  I couldn't find a prepared version in any of the markets I tried, so I found another pinterest recipe for Chai Spice and now we were getting somewhere.  Here's the recipe:  

Almond Cashew Coconut Chai KIND Bar

Ingredients:

Chai Spice Blend:

1 tsp. Ground Cardamom
1 tsp. Ground Allspice
2 tsp. Ground Cinnamon
1 tsp. Ground Cloves
3 tsp. Ground Ginger

This will make a surplus of chai spice, but, trust me, you will want to make these again.

Nut Mixture:
1 C. Roasted and Unsalted Almonds
1 C. Roasted and Unsalted Cashews
2 C. Unsweetened, Shredded Coconut
1 Tbsp. Ground Flaxseed

Syrup:
1/2 C. Honey
1/3 C. Brown Rice Syrup
1 tsp. Chai Spice Blend
1 tsp. Vanilla Extract
1/4 tsp. Salt

Instructions:

Grease a 9x9 baking dish.

Add toasted almonds, coconut and flax to large bowl.  Stir to combine; set aside.

In 1-1/2 or 2 quart saucepan, combine honey, rice syrup, chai spice, salt, and vanilla over medium-high heat. Cook, stirring frequently, until mixture reaches 260 degrees (hard ball stage) on a candy thermometer. Immediately, pour mixture over nut mixture, stir until evenly coated.

Quickly transfer to greased/sprayed 9x13 pan, use hands to spread mixture evenly in pan; press the mixture to close in holes and distribute evenly all over the pan. Using bottom of greased/sprayed drinking glass to tap and compact mixture in pan. Let cool 20 minutes (pan should still be slightly warm).

The original instructions say to invert pan on cutting board and tap until mixture falls out in one piece. I had to give my bars a little more help.  Cut into bars. (If they cool too much and become too hard or brittle to cut easily, put in warm oven for 1-2 minutes to soften; proceed with cutting.)

 STORAGE TIPS: Allow to cool completely before transferring to airtight storage container with parchment paper between layers. For take-along convenience, use parchment paper pieces to wrap individual bars burrito-style. Store at room temperature for up to 1 week. May refrigerate to extend storage or if firmer, less sticky bars are preferred. May be frozen.

Makes approximately 20 bars.

Friday, April 17, 2015

Almond Meringues

Every time I make Challah bread I lament the fact that I am throwing 6 egg whites away.  I hate to waste, but egg whites?  What am I going to do with egg whites?  The go to is anything meringue.  The thing is, I just don't love meringue.  As a child my mom would make gorgeous lemon meringue pies and my sister and I would split it.  She'd take the meringue, I'd take the lemony goodness.  But, I really shouldn't waste these egg whites.  And, I should probably have something to show after a day of solitude... OK.  Meringues it is.  Meringues they are?  Hmn.

I found a recipe for more pavlova style meringues and decided to omit the toppings and add some almond extract.  This is from a British recipe, so I am using grams.  It always turns out better than trying to use a conversion.  If you don't have a scale that can do grams and ounces?  Get one.  It's really handy.

Almond Meringues

makes 24 large meringues

Ingredients 

6 Egg Whites, room temperature
1 scant teaspoon almond extract
350 grams Sugar

Instructions

  1. Preheat the oven to 300 degrees.
  2. Prepare 2 baking sheets with parchment paper.
  3. Place egg whites into a large clean bowl.  Add almond extract and beat until they form soft peaks.  Add approximately 1/2 of the sugar and continue to beat. 
  4. Add the remaining sugar one spoonful at a time until all is combined and the mixture forms stiff peaks.
  5. Spoon the meringue onto the prepared baking sheets and bake for 15 minutes.
  6. Reduce the oven temperature to 225 degrees and cook for a further 2-3 hours until crisp and dry.
  7. When they are cooled they can be stored in an air tight container.


Friday, December 26, 2014

Gingerbread Cake


This delightful cake recipe is from the February 2000 issue of gourmet magazine.  This winter I was inspired by this amazing photo (left side, middle) and knew I had to make a ginger cake that would stand up to the beautiful topping.  When Jill brought the cake to a party, I knew I had found my cake.  I should have consulted the picture a little more, because the final result wasn't nearly as pretty.  We can try again next year.  I've made a slight modification of the recipe because, as I discovered, beer and molasses can boil over quickly - got to keep a tight eye on them.  Otherwise this recipe is as posted.

I used a generous portion of Wilton's Cake Release and had no trouble with the bundt pan or the springform (yes, I made two).  I made them 12/23, so that the flavors could meld for Christmas Eve and Christmas Day.  The cake is very tender, yet hearty and rich and it does improve with age.

Ingredients

1 C. Oatmeal Stout or Guinness Stout
1 C. Dark Molasses (not blackstrap)
1/2 tsp. Baking Soda
2 C. All-purpose Flour
1.5 tsp. Baking Powder
2 Tbsp. Ground Ginger
1 tsp. Ground Cinnamon
1/4 tsp. Ground Cloves
1/4 tsp. Grated Nutmeg
Pinch of Ground Cardamom
3 lg. Eggs
1 C. Packed Dark Brown Sugar
1 C. Granulated Sugar
3/4 C Grapeseed Oil
Confectioners sugar for dusting

Accompaniment: Unsweetened whipped cream

Instructions: 

Bring stout and molasses to a boil in a large saucepan watching carefully as it can boil over quickly. Once boiling remove from heat. Whisk in baking soda, then cool to room temperature.

Preheat oven to 350°F. Generously butter bundt pan and dust with flour, knocking out excess.

Sift together flour, baking powder, and spices in a large bowl. Whisk together eggs and sugars. Whisk in oil, then molasses mixture. Add to flour mixture and whisk until just combined.

Pour batter into bundt pan and rap pan sharply on counter to eliminate air bubbles. Bake in middle of oven until a tester comes out with just a few moist crumbs adhering, about 50 minutes. Cool cake in pan on a rack 5 minutes. Turn out onto rack and cool completely.

Serve cake, dusted with confectioners sugar, with whipped cream. Do ahead: This gingerbread is better if made a day ahead. It will keep 3 days, covered, at room temperature.

Tuesday, November 11, 2014

Sole with Brown Butter Lemon Sauce

It's not every day that a four-year-old asks for Sole A La Meuniere, but you know when he does that it must be something special.  My kids aren't big eaters.  I've said it before, but it's true.  This is the ONLY recipe I have that everyone wants more of.  The last few times I've made it I have noticed the disappointment on my husband's face when the boys say they'd like seconds leaving none for him.  So, next time we'll be making a double batch and there will be seconds for everyone!


Ingredients


1 lb. Dover Sole fillets
Grapeseed Oil
1 1/4 tsp. Salt
6 Tbsp. Unsalted Butter
1/2 tsp. Black pepper
2 oz Fresh Lemon Juice
1 C. Flour
1/4 C. Flat-leaf parsley


Instructions

Preheat the oven to 300°F.
Dry the sole fillets. Mix flour, 1 tsp. salt and 1/2 tsp. pepper in a large flat dish (I use a pie plate).  Dredge the fillets in the flour and shake off the excess. Stack layers of fish between wax paper.
Heat 2 tablespoons of the oil in a large sauté pan over a medium high flame. When the oil smokes, add 2 fillets and cook for 2-3 minutes on each side (depending on thickness). Transfer to a baking sheet and place in the warm oven; repeat with the remaining fillets. Add oil as necessary, heating to the smoking point before adding the fillets.  

Meanwhile, in a saucepan melt butter over a medium flame, stirring frequently. It will melt, foam, subside, and then begin to bubble again and turn a nutty brown.  Remove from heat immediately as it burns quickly at this point.   If you feel like you need more help with the brown butter, see this tutorial: How to Brown Butter.  Add the lemon juice, parsley, the remaining 1/4 teaspoon of salt, and several grindings of white pepper to taste. Serve the fillets on warm plates with the sauce spooned over.

Thursday, November 6, 2014

Pumpkin Chocolate Chip Cookies


 The trouble with most pumpkin cookies is that they are gooey - not in a decadent way, but in a "I can't let these touch each other or they will all stick to each other" kind of way.  A while back I came upon the Cook's Illustrated recipe for Pumpkin pie, where you cook some of the liquid out of the pumpkin to help improve the texture.  I thought maybe that would help with pumpkin cookies a bit.  The base for this recipe is based on these Pumpkin Chocolate Chip Cookies and I really love the result.  To me brown butter and fall go hand-in-hand.  To be sure they are still soft, especially if you are not careful to cook them thoroughly, but especially right out of the oven they have a nice crispy exterior.  They tend to soften more as they are stored.

Ingredients 


1 C. (2 sticks) Unsalted Butter
1 C. White Sugar
1 C. Light Brown Sugar
2 Lg. Eggs
1 tsp. Vanilla Extract
1 C. Canned Pumpkin Puree
3 C. All-purpose Flour
2 tsp. Baking Soda
1/2 tsp. Salt
1 tsp. Ground Cinnamon
1/2 tsp. Ground Ginger
1/4 tsp. Ground Nutmeg
1/4 tsp.Ground Cloves
12-ounce bag Milk Chocolate Chips, not semisweet
Nonstick cooking spray, parchment paper or stoneware baking sheet

Instructions

Slice butter into smaller chunks and place in a saucepan or skilled over medium heat, stirring frequently.  Do not use a dark bottomed pan and it will be hard to tell when the butter is adequately browned.   See How to Brown Butter for a photo tutorial.   Remove butter from heat immediately and allow to cool for about 20 minutes.

While you are browning the butter, on a separate burner, place pumpkin puree in a small saucepan over medium heat.  Bring to simmering and reduce temperature.  Cook stirring frequently until the mixture has reduced and thickened slightly and looks glossy.  About 10 minutes.  Allow to cool for about 20 minutes.

Meanwhile, in a large bowl, whisk together the flour, baking soda, salt, cinnamon, ginger, nutmeg, and cloves.

Directions Heat the oven to 350 degrees F. Spray cookie sheets with nonstick spray or line them with parchment paper.

Pour browned butter in the bowl of a stand mixer.  Beat in the white and brown sugars, a little at a time, until the mixture is light and fluffy. Beat in the eggs 1 at a time, then mix in the vanilla and pumpkin puree.  Slowly beat the flour mixture into the batter in thirds. Stir in the chips.

Scoop the cookie dough by heaping tablespoons onto the prepared cookie sheets and bake for 15 to 20 minutes, or until the cookies are browned around the edges.  Adjust time for stoneware. Often people want their cooking a little softer, so they take them out while they are still soft in the middle.  Pumpkin cookies will be naturally softer and so you really do want to make sure they are cooked in the center.  Remove the cookie sheets from the oven and let them rest for 2 minutes. Take the cookies off with a spatula and cool them on wire racks.

Apple Cinnamon Oatmeal

My kids love the packets of apple cinnamon oatmeal, but I always feel funny about them.  Like, what is really in them?  And, oatmeal is so easy to make, does it really need a shortcut?  I get the whole traveling, camping utility of oatmeal packets, but I also like knowing I can spell everything in the food I serve my family.  So, I came up with this recipe as an alternative.  This is super quick and tastes so fresh.  Right away you'll notice the true apple taste is nothing like the store bought flavor.

Ingredients

2 Apples
2 Tbsp. Brown Sugar
3/4 tsp. Ground Cinnamon
1 C. Oatmeal
2 1/4 C. Water
2 pinches Salt

Instructions

Peel apples and grate them over a medium sauce pan.  Add brown sugar, cinnamon, oatmeal, water and salt and stir to combine.  Bring to a simmer and reduce heat to medium low.  Cook, stirring occasionally for 5 minutes or until water is absorbed.

Makes 2 large servings, 4 kid-size.


Saturday, October 18, 2014

Fried Eggs and Asparagus

Last weekend Scott and I were in a mountain town celebrating my birthday without kids.  We stopped into a place that is renowned for breakfast.  Admittedly, I wasn't in a great mood.  But, when a breakfast place can't get the coffee right, weeeeell...  I had considered just going for the bread pudding because, hey, it was my birthday and there are eggs in it, right?  I decided to behave and get the two eggs, bacon and potatoes instead, but when I asked the waitress to cook the eggs sunny-side-up, but make sure the white was cooked, while the yolk is runny...  (I know what you're thinking.  I am that person.)  Suffice it to say we had a disagreement about what can and cannot be done with eggs and before things escalated I settled on the bread pudding and decided to mooch bacon from the man who doesn't dine on the swine.

Growing up we called fried or sunny-side-up eggs "dip eggs" because they are so good to dip your toast in.  Remarkably many of my childhood memories center around soft-yolked eggs and eating them with family members and neighbors I love.  Without question they fit into my comfort food category.  These days they go by the name flat-eggy and my middle child gobbles them up.

Now, I love cooking - it's often the quiet part of my day when school is done and the kids are playing outside or entertaining themselves and I get to huddle in the kitchen and cook and putz around mostly in peace.  But there are some days when I am lacking the energy, time, or creativity to whip up something fancy.  On these days I love resorting to breakfast for dinner and one of the easiest and most balanced ways to do this is to cook up some veggies and throw a fried egg over the top of it and serve it with toast.  I love how the soft yolk runs over the veggies.  


Fried Eggs and Asparagus

Serves 2
This isn't so much a recipe as an idea - adjust the quantities of asparagus and eggs to suit your needs.  

1 bunch Asparagus
4 Eggs
1 Tbsp.(ish) Olive Oil
Salt and Pepper to Taste

Preheat oven to 400 degrees.

Rinse and trim the dry ends off the asparagus.  Place on a dishtowel and blot dry then transfer to a cookie sheet.  Pour olive oil over the asparagus and season with salt and pepper to taste.  Rotate the asparagus and make sure it is coated with the oil and seasoning and arrange in a single layer on the cookie sheet.  Roast for about 20 minutes, or until your desired tenderness.


Meanwhile, when you have about 5-10 minutes left on the asparagus, heat up a non-stick skillet over medium heat and spray with non-stick spray or a touch of oil.  Crack eggs into skillet and reduce heat to low.  Sprinkle with salt and pepper and allow them to slowly cook until they reach desired firmness.  As we now know, my preference is for them to have a runny yolk, but firm white that isn't burnt on the bottom, which can best be achieved by cooking them low and slow.

To serve: place 1/2 portion of asparagus on each plate and top with two eggs.  Don't forget the toast.


Wednesday, April 30, 2014

Cold Brewed Iced Coffee

It's been a couple years since I've started making iced coffee.  The truth is, this is my favorite way to drink coffee.  This recipe is adapted from one I found on pinterest.  Typically, I don't like sweetened coffee, but this cup is served best with a little milk and the little bit of sugar goes a long way.  You'll need a french press some means of filtering the coffee after it has finished the cold brew.  This is what we use: http://bodum.bodum.com/us/en-us/shop/detail/K11081-01/

Ingredients

1 1/4 C. Coarsely Ground Coffee (French Press or Percolator setting)
1/2 tsp. Ground Cinnamon
2 Tbsp. Brown Sugar
Cold Water (I just fill to the top of the french press, but I am assuming it would be somewhere around 40 oz)

Instructions

Guys, this is a really complicated process.
Place ground coffee in the bottom of the coffee press.  Add cinnamon, brown sugar and water.  Stir with wooden or plastic spoon (according to Bodum - do not use metal).
Place flat cover on (or cover with plunger kept up) and set on counter to brew for 4 hours (8 hours in fridge).
Press the plunger down.
Get a glass with ice (preferably something cute), pour coffee over leaving room for cream.  Add milk or cream.  Enjoy.
Store coffee in the refrigerator.


Tuesday, December 3, 2013

Kombucha Gingerale

It's been over a year since my dear friend Mandy was offering up some SCOBYs.  My husband has a little thing for kombucha, but I never got on the bandwagon until we started making our own.  I thought this might be a nice thing to do for him and this is the kind of thing I do.  So, I picked up the "Mothers" from her and set to work.  There's a lot of variation about making 'buch on the interwebs, so at some point you just have to take a stab at it and see how it goes.  After making it for over a year, we have found our method that is tried and true.

Update: we had some trouble after the hot some with imbalanced SCOBYs, so I've updated the recipe with less sugar and more flexibility.  5-days worked for us for a long time, but then just started not working anymore.  One of the most important things you can know about making kombucha is that it's not a static process.  Sometimes you'll need more time to ferment, sometimes less.  Sometimes more sugar, sometimes less.  Keep experimenting until you find the right balance for you!


For each SCOBY you will need:

  • 2 - 4.2 qt Hermetic Jars ($13 at Container Store) 
  • 1 C. White sugar (most of it converts during the process, but sugar is necessary) 
  • 5 Irish Breakfast tea bags (any black tea will do, research if you'd like to use green or herbal as I believe you need to modify the recipe.) 
  • Water 
  • SCOBY (symbiotic colony of bacteria and yeast)  or "Mother."  Search around because most kombucha makers have an excess.  I've been known to advertise them on freecycle and craigslist for free.  If you live in LA, contact me. I'll give you one.  
  • Ginger (lots) - we buy several pounds at a time from the chinese market.  It is fresher and much less expensive than the regular store.  Process it in the food processor, skin and all, until nicely chopped.  I use a mini loaf pan to mold the ginger into 1/4 C. portions and then freeze.  Once they are frozen I transfer them to a freezer safe container.  If you don't want to use ginger you can use anything that has sugar in it - fruit, juices, etc.  Although, I've heard citrus juices have extra conditions, so read up on it if you want to use citrus.
  • Rubber band 
  • Wooden spoon 
  • Mesh strainer 
  • Funnel
  • Iced Tea pitcher and extra glass or plastic jars for storage of finished kombucha.  Be cautious with glass containers as they have the ability to explode if they are stored too long.  


Directions for First Ferment:


  1. In your glass jar pour 1 C. sugar and 5 tea bags. 
  2. Boil water and pour into jar about 2 inches full so it is enough to dissolve sugar and steep tea. 
  3. Stir tea and sugar with a wooden spoon and let it sit for 10 minutes. 
  4. Fill up the rest of the jar with cool water and take tea bags out. 
  5. Place SCOBY on top. 
  6. Cover top of the jar with a dishcloth or cloth napkin and fasten with a rubber band.
  7. Set in a dark place at room temperature for 5 days (this is really a minimum time - most important is that you notice a sour, vinegar-like smell).  The balance of a SCOBY can be disrupted by a number of factors, so you will want to pay more attention to the color (golden brown) and smell than the number of days.  
  8. At the end of 5 days (or however long it takes to achieve your brew), prepare your second jar (repeating steps 1-4). 
  9. Transfer SCOBY from your 5-day batch into the newly prepared Jar.

This is what it should look like after 5 days.  The color will change to a light golden brown.  Notice all the things dangling from the SCOBY - this is good.


Directions for Second Ferment:

In your first jar with the completed first ferment add 1/2 c. grated ginger or other flavoring.
Seal the jar with the air-tight lid and let it sit for at least 2 days minimum - Usually we let ours sit for five days and do both steps together.

Directions for Storage:

This is what the 'buch looks like when the second ferment is done.
Strain out the fruit or whatever you added with a mesh drain and use funnel to transfer to storage bottles.  Store in a cool dark place until needed.  We usually keep an iced tea pitcher in the refrigerator and replenish with the stored 'buch as needed.
These are some of the jars we use for storage.  The Arizona Tea jar is awesome.

A word to the wise: 

Be careful when you open your air-tight container. The longer the kombucha sits, the fizzier it gets. I have had kombucha sprayed all over my ceiling twice.  Twice.  So, go slow when you open.

Another Word: 

A new SCOBY forms with each step in the process.  You can separate the SCOBY from the larger SCOBY in the first batch and share with friends. The ginger will usually get caught in the SCOBY from the second stage and should be discarded.  In the final storage containers there will be a very small SCOBY-like formation that can easily slip into your drink undetected.  I speak from experience when I say it can even be slurped up through a straw.  Do yourself a favor and look for it before you get it accidentally.  I call it a slug.  And, well, you can imagine what it's like to get that thing in your mouth.


Sunday, August 25, 2013

Panko Crusted Fish

I made this recipe ALL THE TIME until I started to write this post about 9 months ago.  It was at that point that I learned striped pangasius is most definitely not kosher.  This fish works so well with this recipe that I've been unmotivated to try something else.  Seeing as how I am an all-or-nothing kind of gal it's been taken out of the rotation.  Look, it's not like we keep a kosher house, but if I'm going to keep the hubby happy I can at least keep unkosher meat out of the house.  Boo for all the glorious recipes with pancetta that we are missing.  Anyway, this really is a great recipe and the kids gobble it up.  I suppose the kid-friendlyness of it is what kept me coming back to it - even though it meant a three step breading process.  I think you'll like it.

1/2 C. All-purpose flour
4 1/2 tsp. Chili powder
1 Kosher salt 1 tsp.
Black pepper
3 lg. Eggs, well beaten
1 1/2 C. Panko bread crumbs
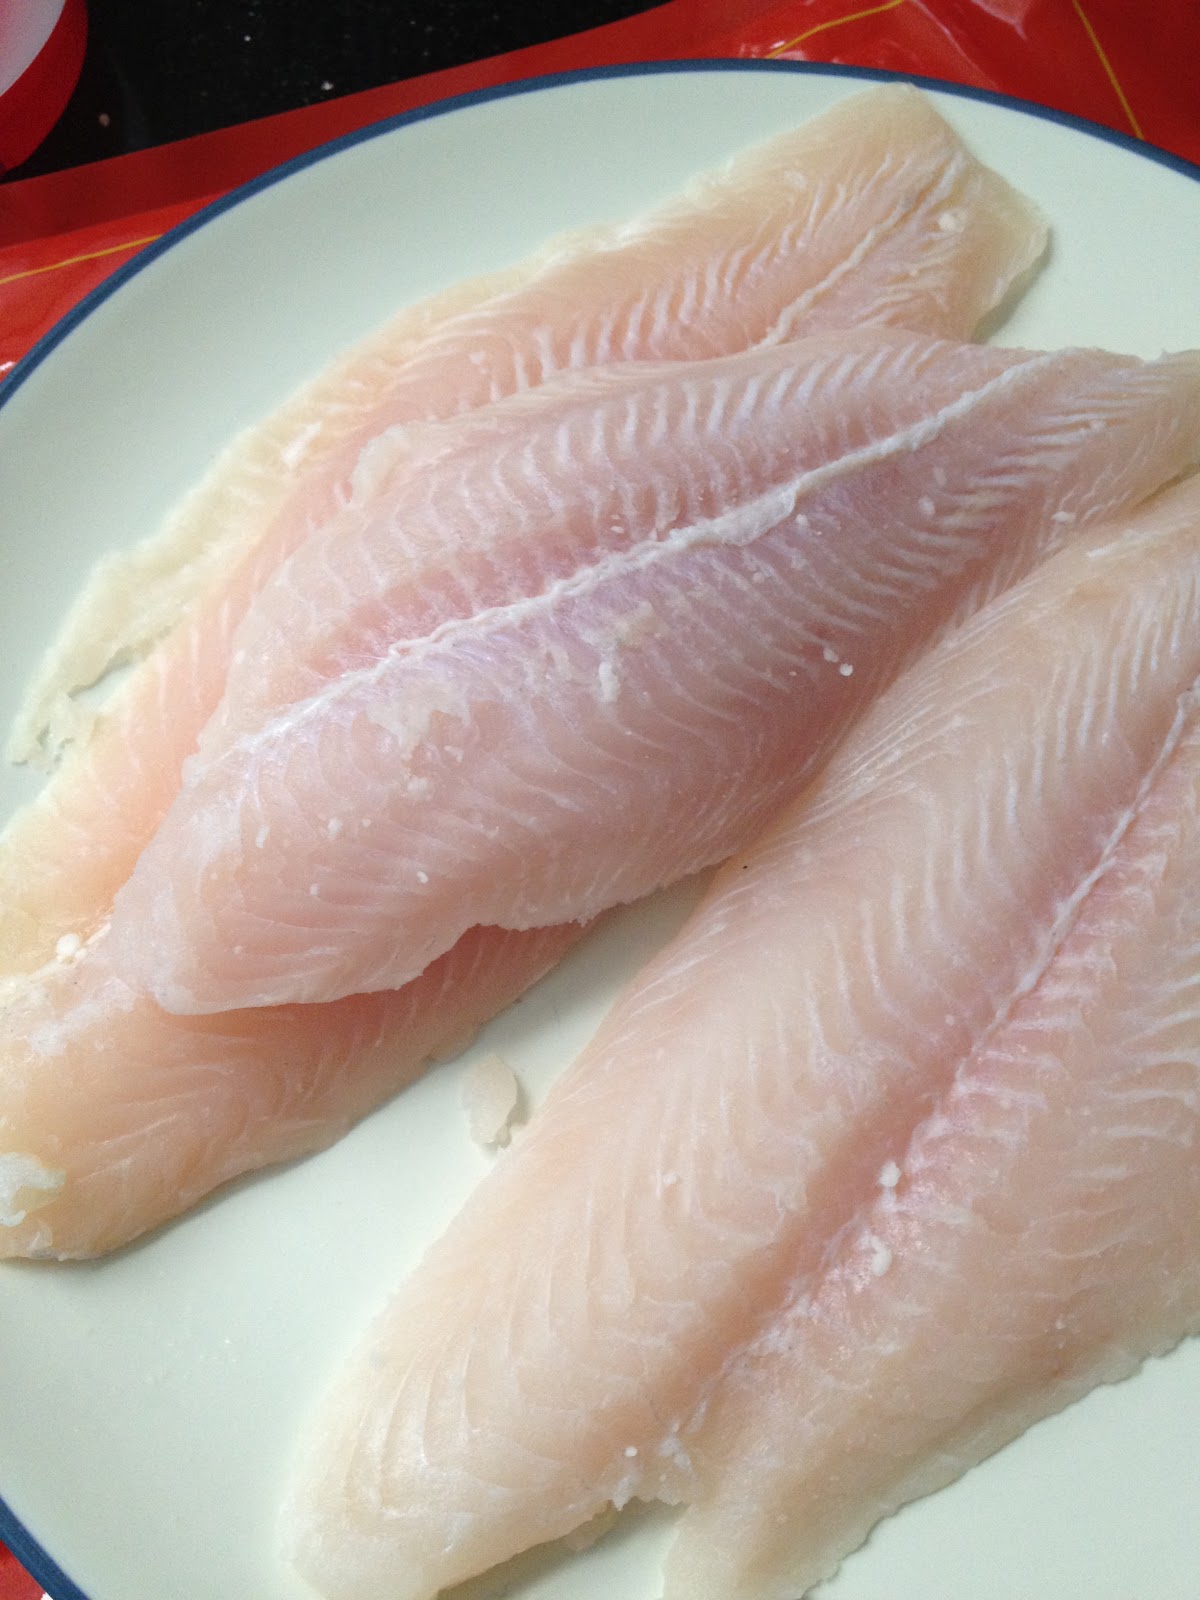
1 lb Striped Pangasius, petrale sole or other thin white fish fillets (8 to 12 fillets), cleaned, skinned
Vegetable Oil for frying (I use grapeseed oil)
 
This is striped pangasius from Trader Joe's.  Very mild.


In a pie plate, baking dish or wide bowl, blend the flour, chili powder salt and pepper

Add eggs to another bowl and beat until well mixed.  Add panko to a third bowl.  Notice I have three separate forks for each bowl. 
Using your first fork spear the fish and place in the flour mixture and cover with flour.  Make sure it is coated, but you do not want blotches with extra coating.  Use the first fork to help shake the fish free of excess coating and place it in the second bowl with the beaten eggs.


Using the second fork, pick up the fish and coat it on both sides.  Before you transfer it to the panko let the excess egg drip off.  Use the second fork to place the fish in the panko.


Using the third fork, coat the fish with panko breadcrumbs.  You can stack the coated breadcrumbs on a plate as you finish the other pieces.


Heat vegetable oil in a 12-inch skillet over high heat.  Working in batches, add fish pieces.  Be careful not to over crowd the pan.  Cook fish for two minutes or until lightly browned.  Turn fish and cook for another minute or so until browned.  Keep cooked fish warm in an oven set to the lowest setting while you finish cooking the remaining fish.