Pages

Tuesday, February 14, 2012

Homemade Caramel Sauce

My ladies small group does a happy hour for the family once a month so the men folk and kids can see each other, too.  This month I made another pinterest find: Caramel Budino with Salted Caramel Sauce.  You can click on the image below for the whole recipe, which was pretty good, but to me the real star was the salted caramel sauce.  We have been enjoying the leftovers on vanilla ice cream, but I can imagine it would be wonderful on crepes and a variety of other desserts.
Caramel Budino with Salted Caramel Sauce

Salted Caramel Sauce 
3/4 cup plus 2 tablespoons heavy cream
1/2 vanilla bean, split lengthwise (I used 1 tsp. Vanilla Extract)
1/2 cup sugar
2 tablespoons light corn syrup
4 tablespoons (1/2 stick) chilled unsalted butter, cut into 1/2" cubes
1/4 teaspoon kosher salt

Place cream in a small pitcher. Scrape in seeds from vanilla bean; add bean. Set aside.

Stir sugar, corn syrup, and 2 tablespoons water in a heavy saucepan over medium heat until sugar dissolves. Increase heat to medium-high; boil, occasionally swirling pan and brushing down sides with a wet pastry brush, until deep amber color forms, 5–6 minutes. Remove from heat; gradually add vanilla cream (mixture will bubble vigorously). Whisk over medium heat until smooth and thick, about 2 minutes. Remove from heat; whisk in butter and salt. Strain into a heatproof bowl. Let cool slightly.

Saturday, February 11, 2012

Butternut Squash Pizza with Crispy Sage

I am so bad about posting.  You know what it is, don't you?  I'm cooking alright, so it's not the new baby excuse.  I always think as I cook, "oh, I should be taking pictures," but don't.  And by the time I get the food ready, I am focused on getting the table set, the boys hands cleaned, and the food and drinks on the table.  But this, my friends, was too good to not post.  So, I took a picture after we had devoured most of the pizza.  I'm pretty sure if I hadn't seen the picture of the recipe I adapted from on pinterest I would have thought it sounded a little strange.  But, the picture got me.  It's been happening a lot that way on pinterest lately and so we've been trying a whole lot of new recipes.  If you don't want to make the ricotta every time you make the pizza you can freeze and save it for next time.


Butternut Squash Pizza with Crispy Sage
Inspired by a recipe in Chez Panisse Vegetables
Yield = one 12-inch pizza

Pizza dough (I used Trader Joe's to save time)
1 sm Butternut Squash (about a pound, but you will likely have leftover squash)
olive oil
Kosher Salt
2 cl Garlic
Fresh Ricotta
2 full sprigs Frsh Thyme, leaves removed
Handfull Shredded Mozzarella
Handfull Shredded Fontina
1/4 C. Parmigiano Reggiano
10-15 sage leaves
Vegetable Oil for frying

1. Preheat the oven to 400ºF. Peel and seed the squash.  Cut the peeled squash crosswise into 1/4-inch thick slices. I used a mandoline, which saves time and creates uniform pieces (and also cut the heck out of my hand because I never seem to use the protective holder), but using a knife works just fine, too.

2. Place the slices of squash in a bowl, drizzle with olive oil, season with kosher salt to taste, toss to coat, place on baking sheet in one layer and place in the oven for about 20 minutes, or until fork tender.

3. Meanwhile, peel and finely chop the garlic and add it to olive oil (the recipe called for 1/4 C., but I used about half that much). After rolling out a pizza round and placing it on a prepared baking sheet (see recipe above), brush dough with the garlic olive oil.  Spoon teaspoon-sized drops of fresh ricotta over the garlic oil. Sprinkle with fresh thyme to taste, mozzarella and fontina. Top with baked squash slices. Top with grated Parmigiano. Bake for 8 to 10 minutes (per the original recipe - I used a pizza stone and it took about 18 minutes).

4. Meanwhile, heat vegetable oil in a small skillet. When oil is hot add only a few sage leaves at a time. The sage leaves should take no longer than 5 seconds in hot oil to crisp up.  Remove them with a fork or tongs and rain on a paper towel.

5. Remove the pizza from the oven and top with the crispy sage. Yum!

Saturday, January 14, 2012

Black Bean Soup

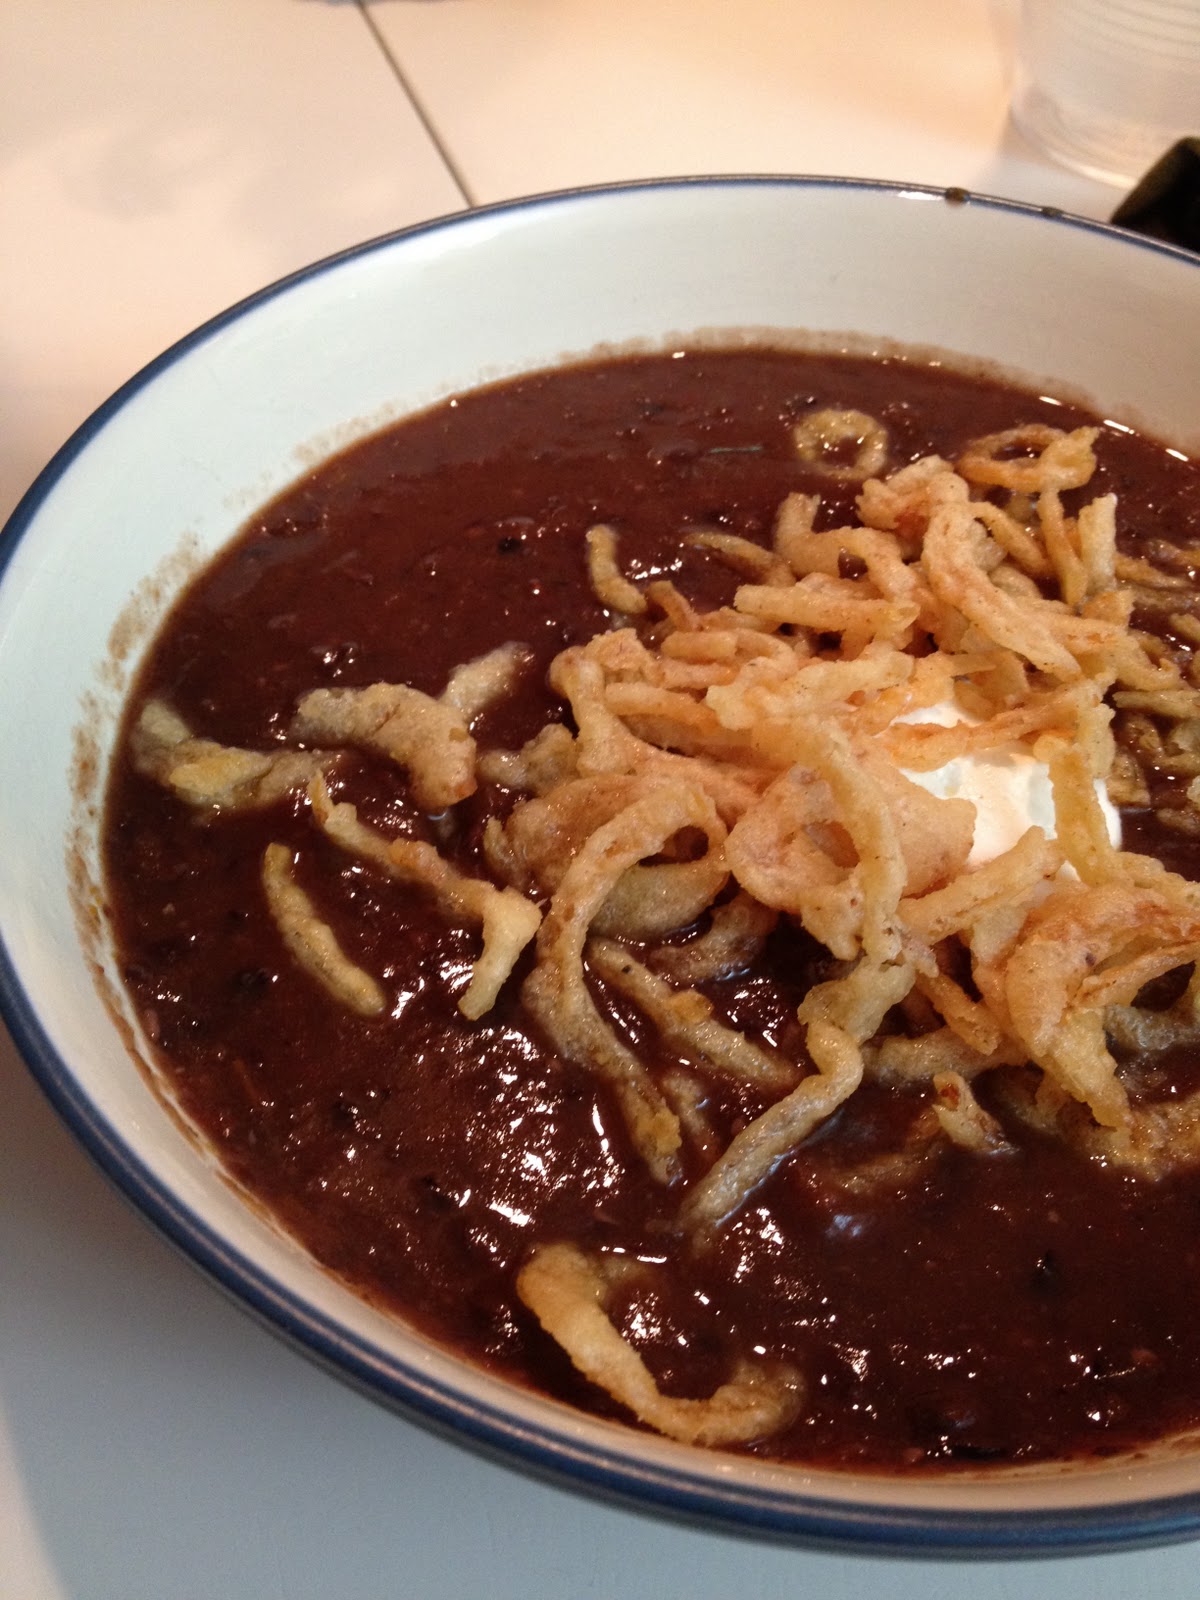
This recipe is adapted from Smitten Kitchen.  I rarely use the crock-pot because I really don't like what it does to meat and there aren't too many vegetarian recipes for it.  This is an excellent exception and has become a staple recipe in our house.  I reduced the water from the original recipe because I like it to be a little thicker, which is also why I use the hand-blender.  I don't fuss with her toasted cumin seed crema as sour cream is just fine (read easier) and on a whim I added the fried onions (probably leftover from Thanksgiving) as a topping.

1 Tbsp. Olive Oil
2 Med Red Onions, chopped
3 Med. Bell Peppers, any color, chopped (I like to use the tri-color peppers from TJ's)
4 cl Garlic, minced
4 tsp. Cumin 16 oz
Dried Black Beans
1 tsp. Pureed Chipotle in Adobo (can reduce to taste)
6 C. Chicken or Vegetable Broth
2 Tbsp. Lime Juice
2 tsp. Kosher Salt
1/4 tsp. Black Pepper
Sour Cream
Fried Onion Strings (French's or other)

Puree a can of chipotle peppers in adobo sauce and reserve 1 tsp. for soup (remaining puree can be kept in fridge for a very long time).

Heat olive oil in large skillet over medium-high heat. Add onions and bell peppers and sauté until beginning to brown, about eight minutes. Add garlic and cumin; stir one minute. Stir in broth to deglaze pan. Transfer mixture to 6-quart slow cooker. Add beans and chipotle puree. Cover and cook on high until beans are very tender, about 3 hours.

Use a hand-blender to puree soup to a chunky texture or transfer two cups bean mixture to blender; puree until smooth then return to remaining soup in slow cooker. Stir in lime juice, salt, and pepper. Adjust seasonings to taste.

Ladle soup into bowls. Spoon dollop of sour cream and onion strings over each bowl and serve.

Pecan Sticky Buns


I made a batch of these rolls toward the end of my pregnancy, knowing that it would be nice to have something freshly baked without having to put in the effort with a new baby around.  So, I made them (dividing them between two cake pans) and put them in the freezer before the second rise.  Yesterday, I thought to take a pan out of the freezer and let them defrost in the fridge, I then placed them on the counter overnight to rise and they were just about ready to pop in the oven when we woke up this morning.  I couldn't have enjoyed them more. 

The page in my All-Time Best Recipes edition of Cook's Illustrated where this recipe is found is torn, creased and stained.  I've made it several times, but on the last attempt I decided I wanted something a little simpler.  In the original recipe they have you make a caramel glaze and then create a separate pecan topping to be poured on after the rolls are baked.  It seems like a very unnecessary step to me and the rolls lack a little bit of that gooeyness that makes a caramel roll so wonderful.  So, I combined the caramel glaze and the pecan topping ingredients to make a simpler and gooeyer sticky bun.  In my opinion, the original recipe skimps a little on the pecans, too.  So, I've made a note to increase the amount of nuts.  I guess I'll have to make them again.  Here is my modified version:


Dough

3 lg. Eggs, room temperature
3/4 C. Buttermilk, room temperature
1/4 C. Sugar
1 1/4 tsp. Salt
2 1/4 tsp. Instant Yeast (1 packet)
4 1/4 C. All-purpose Flour
6 Tbsp. Unsalted Butter, melted and cooled until warm

Cinnamon Sugar Filling
3/4 Light Brown Sugar
2 tsp. Ground Cinnamon
1/4 tsp. Ground Cloves
Pinch Table Salt
1 Tbsp. Unsalted Butter, Melted

Pecan Topping
9 Tbsp. Unsalted Butter
1 C. Light Brown Sugar
6 Tbsp. Light or Dark Corn Syrup
Pinch Table Salt
2 Tbsp. Heavy Cream
1 tsp. Vanilla Extract
3/4 C. Coarsely Chopped Pecans (I think this amount could be doubled, frankly.  You can never have to many pecans)

Dough
In bowl of stand mixer, whisk eggs to combine; add buttermilk and whisk to combine.  Whis in sugar, salt and yeast.  Add about 2 C. flour and butter; stir with wooden spoon or rubber spatula until evenly moistened and combined.  Add all but 1/4 C. remaining flour and knead with dough hook at low speed for 5 minutes.  Check consistency of dough (should feel soft and moist but should not be wet and sticky; add more flour if necessary); knead at low speed 5 minutes longer (dough should clear sides but stick to bottom).  Turn dough out onto lightly floured work surface; knead by hand about 1 minute to ensure that dough is uniform (dough should not stick to work surface during hand kneading; if it does stick, knead in additional flour 1 Tbsp. at a time).

Lightly coat large bowl with flavorless cooking oil (I use grapeseed).  Transfer dough to bowl and turn to coat with oil.  Cover bowl tightly with plastic wrap and set in warm, draft-free pot until doubled in volume, 2 - 2 1/2 hours.

Pecan Topping
Combine all ingredients for the topping, except vanilla and pecans, in a medium saucepan.  Cook over medium heat, whisking occasionally, until butter is melted and mixture is thoroughly combined.  Remove from heat and stir in vanilla and pecans until combined.  Pour mixture into nonstick metal 13x9-inch baking dish (I have used 2 metal nonstick cake pans, 2 pie plates and a glass baking dish all with good results); using rubber spatula, spread mixture to cover surface of baking dish.  Set dish aside.

To assemble and bake buns
For filling combine grown sugar, cinnamon, cloves and salt in small bowl and mix until thoroughly comvined, using fingers to break up sugar lumps; set aside. 

Turn dough out onto lightly floured work surface.  Gently shape dough into rough rectangle with long side nearest you.  Lightly flour dough and roll to 16x12-inch rectangle.  Brush dough with melted butter, leaving 1/2-inch border along top edge; with butter remaining on brush, brush sides of baking dish.  Sprinkle filling mixture over dough, leaving 3/4-inch border along top edge; smooth filling in even layer with hand, then gently press mixture into dough to adhere. 

Beginning with long edge nearest you, roll dough into taut cylinder.  Firmly pinch seam to seal and roll cylinder seam-side down.  Very gently stretch to cylinder of even diameter and 18-inch length; push ends in to create even thickness.  Using serrated knife and gentle sawing motion, slice cylinder in half, then slice each half in half again to create evenly-sized quarters.  Slice each quarter evenly into thirds, yielding 12 buns.

Arrange buns cut-side down in prepared baking dish; cover tightly with plastic wrap and set in warm, draft-free spot until puffy and pressed against one another, about 1 1/2 hours.  Meanwhile, adjust oven rack to lowest position, place pizza stone (if using) on rack, and heat oven to 350 degrees.

Place baking pan on pizza stone; bake until golden brown and center of dough registers about 180 degrees on instant-read thermometer, 25-30 minutes.  Cool on wire rack 10 minutes; invert onto rimmed baking sheet, large rectangular platter, or plate if using pie or cake pans.  With rubber spatula, scrape any topping remaining in baking pan onto buns; cool slightly.

Wednesday, December 21, 2011

Apple Cider Doughnuts

-->
This recipe is adapted from one I found on the food network.  Really, what 40+ week pregnant woman should be fussing with doughnuts, or the additional effort of rolling out dough and cutting the shapes out?  Insanity.  To cut down of effort, I knew that I would be making "doughnut holes," and I was actually hoping that I would be making this recipe after coming home from the hospital instead of before heading to.  So, I did the applesauce and glaze making in advance and froze them.  The recipe didn't specify whether to use spiced cider or not, so I opted for spiced. Finally, the original recipe calls for dipping the doughnuts in cinnamon sugar, which 1. was too sweet, and 2. I botched the recipe and added all the cinnamon to the dough, so I figured more cinnamon would be overkill.  It worked out in the recipe, however, so I've kept the extra cinnamon and I doubled the glaze because it wasn't quite enough for all the doughnuts.

2 Med. Apples (I used fuji)
3 1/2 C. Spiced Apple Cider, divided
3 1/2 cups all-purpose flour, plus more for dusting
4 teaspoons baking powder
1/4 teaspoon baking soda
3 1/2 teaspoons ground cinnamon
1 teaspoon salt
1/4 teaspoon freshly grated nutmeg
2/3 Sugar
3 Tbsp. Vegetable Shortening
1 large egg plus 1 egg yolk
1/4 C. Buttermilk
1 tsp. Vanilla
2 C. Powdered Sugar
Vegetable oil for frying

-->
Core and coarsely chop the apples (do not peel). Combine with 1 1/2 cups cider in a medium saucepan over medium heat; cover and cook until softened, about 8 minutes. Uncover and continue cooking until the apples are tender and the cider is almost completely reduced, about 5 minutes. Puree with an immersion blender or in a food processor until smooth. Measure the sauce; you should have 1 cup. (Boil to reduce further, if necessary.) Let cool slightly.
Whisk the flour, baking powder, baking soda, cinnamon, salt and nutmeg in a medium bowl.
Beat granulated sugar and the shortening in another bowl with a mixer on medium speed until sandy. Beat in the egg and yolk, then gradually mix in the applesauce, scraping the bowl. Beat in half of the flour mixture, then the buttermilk and vanilla, and then the remaining flour mixture. Mix to make a sticky dough; do not overmix.
Scrape the dough onto a lightly floured sheet of parchment paper and pat into a 7-by-11-inch rectangle, about 1/2 inch thick. Cover with plastic wrap and refrigerate for at least 2 hours or overnight.
Meanwhile, make the glaze: Simmer the remaining 2 cups cider in a small saucepan over medium heat until reduced to 1/2 cup. Whisk in the confectioners' sugar until smooth and glossy, then set aside.
Heat 2 inches of vegetable oil in a large heavy-bottomed pot over medium-high heat until a deep-fry thermometer registers 350 degrees. Line a baking sheet with paper towels. Cut the chilled dough into small (approx 1-inch) squares and shape into balls. Slip 4 or 5 doughnuts at a time into the hot oil and fry until golden brown, 1 to 2 minutes per side, adjusting the heat as needed. Transfer to the paper towels to drain.