Pages

Tuesday, November 11, 2014

Sole with Brown Butter Lemon Sauce

It's not every day that a four-year-old asks for Sole A La Meuniere, but you know when he does that it must be something special.  My kids aren't big eaters.  I've said it before, but it's true.  This is the ONLY recipe I have that everyone wants more of.  The last few times I've made it I have noticed the disappointment on my husband's face when the boys say they'd like seconds leaving none for him.  So, next time we'll be making a double batch and there will be seconds for everyone!


Ingredients


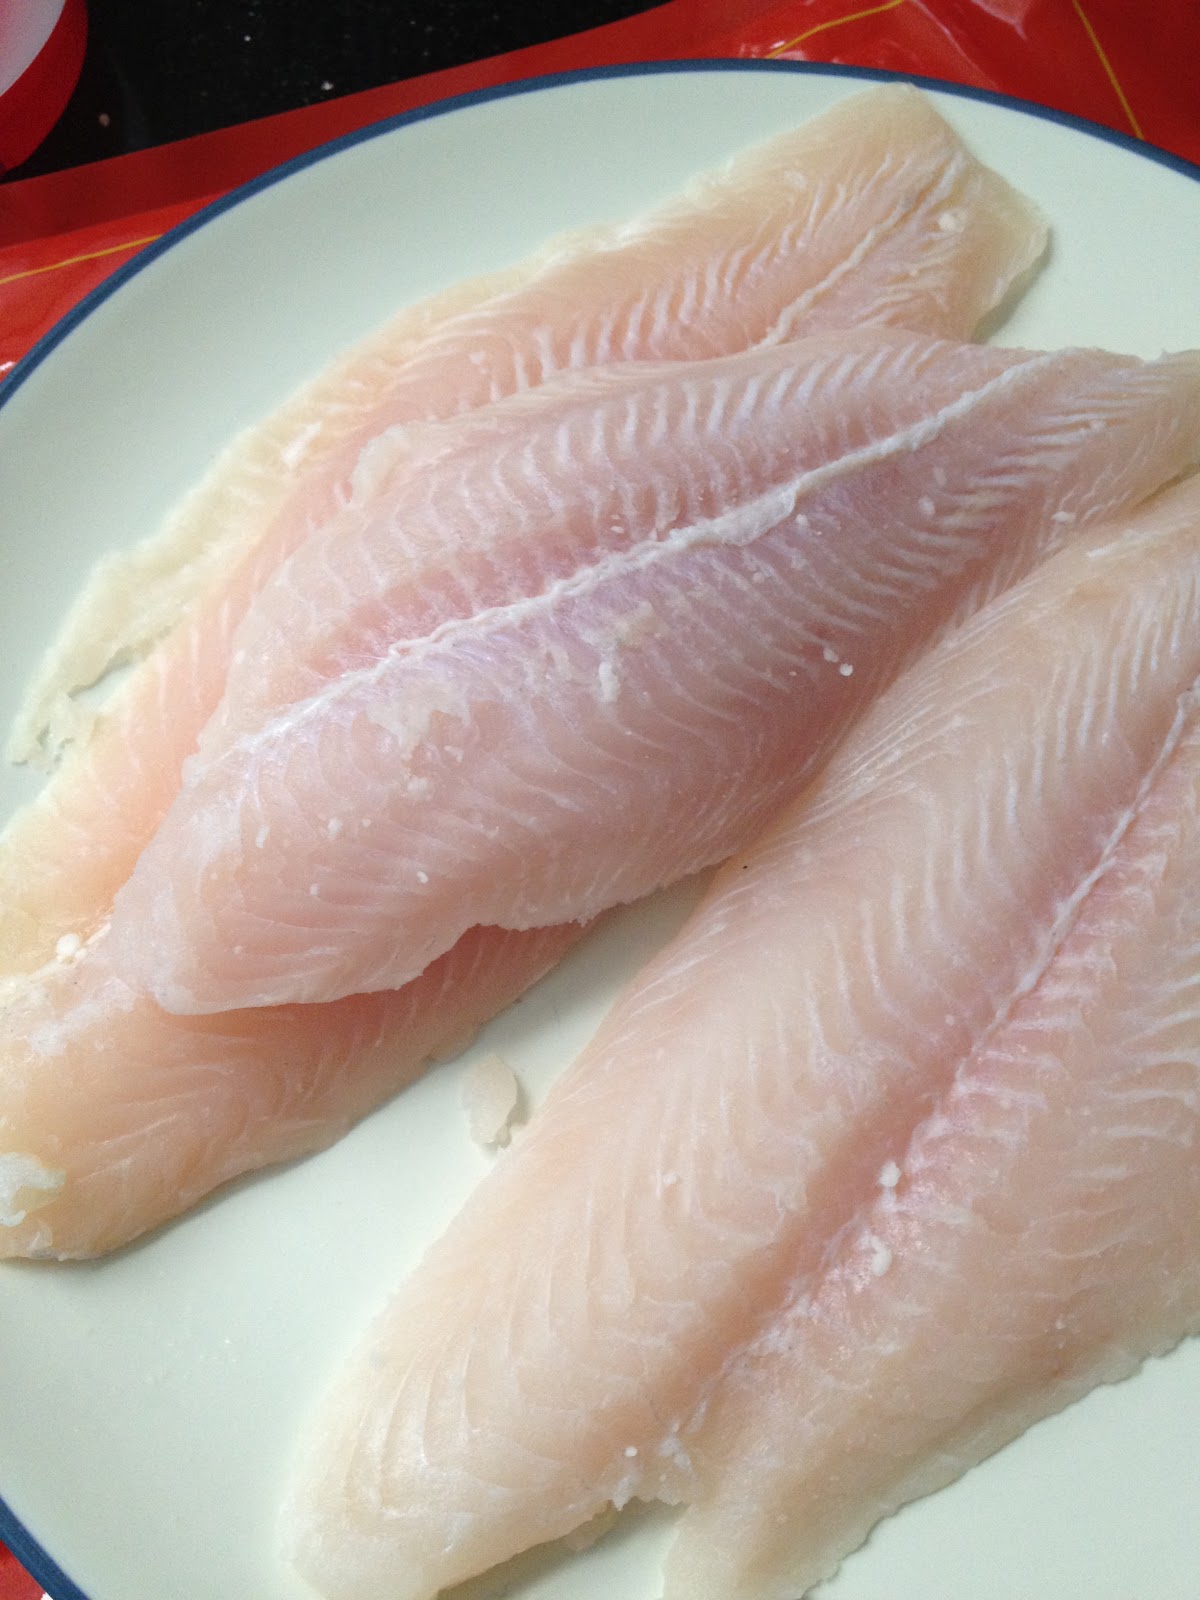
1 lb. Dover Sole fillets
Grapeseed Oil
1 1/4 tsp. Salt
6 Tbsp. Unsalted Butter
1/2 tsp. Black pepper
2 oz Fresh Lemon Juice
1 C. Flour
1/4 C. Flat-leaf parsley


Instructions

Preheat the oven to 300°F.
Dry the sole fillets. Mix flour, 1 tsp. salt and 1/2 tsp. pepper in a large flat dish (I use a pie plate).  Dredge the fillets in the flour and shake off the excess. Stack layers of fish between wax paper.
Heat 2 tablespoons of the oil in a large sauté pan over a medium high flame. When the oil smokes, add 2 fillets and cook for 2-3 minutes on each side (depending on thickness). Transfer to a baking sheet and place in the warm oven; repeat with the remaining fillets. Add oil as necessary, heating to the smoking point before adding the fillets.  

Meanwhile, in a saucepan melt butter over a medium flame, stirring frequently. It will melt, foam, subside, and then begin to bubble again and turn a nutty brown.  Remove from heat immediately as it burns quickly at this point.   If you feel like you need more help with the brown butter, see this tutorial: How to Brown Butter.  Add the lemon juice, parsley, the remaining 1/4 teaspoon of salt, and several grindings of white pepper to taste. Serve the fillets on warm plates with the sauce spooned over.

Thursday, November 6, 2014

Pumpkin Chocolate Chip Cookies


 The trouble with most pumpkin cookies is that they are gooey - not in a decadent way, but in a "I can't let these touch each other or they will all stick to each other" kind of way.  A while back I came upon the Cook's Illustrated recipe for Pumpkin pie, where you cook some of the liquid out of the pumpkin to help improve the texture.  I thought maybe that would help with pumpkin cookies a bit.  The base for this recipe is based on these Pumpkin Chocolate Chip Cookies and I really love the result.  To me brown butter and fall go hand-in-hand.  To be sure they are still soft, especially if you are not careful to cook them thoroughly, but especially right out of the oven they have a nice crispy exterior.  They tend to soften more as they are stored.

Ingredients 


1 C. (2 sticks) Unsalted Butter
1 C. White Sugar
1 C. Light Brown Sugar
2 Lg. Eggs
1 tsp. Vanilla Extract
1 C. Canned Pumpkin Puree
3 C. All-purpose Flour
2 tsp. Baking Soda
1/2 tsp. Salt
1 tsp. Ground Cinnamon
1/2 tsp. Ground Ginger
1/4 tsp. Ground Nutmeg
1/4 tsp.Ground Cloves
12-ounce bag Milk Chocolate Chips, not semisweet
Nonstick cooking spray, parchment paper or stoneware baking sheet

Instructions

Slice butter into smaller chunks and place in a saucepan or skilled over medium heat, stirring frequently.  Do not use a dark bottomed pan and it will be hard to tell when the butter is adequately browned.   See How to Brown Butter for a photo tutorial.   Remove butter from heat immediately and allow to cool for about 20 minutes.

While you are browning the butter, on a separate burner, place pumpkin puree in a small saucepan over medium heat.  Bring to simmering and reduce temperature.  Cook stirring frequently until the mixture has reduced and thickened slightly and looks glossy.  About 10 minutes.  Allow to cool for about 20 minutes.

Meanwhile, in a large bowl, whisk together the flour, baking soda, salt, cinnamon, ginger, nutmeg, and cloves.

Directions Heat the oven to 350 degrees F. Spray cookie sheets with nonstick spray or line them with parchment paper.

Pour browned butter in the bowl of a stand mixer.  Beat in the white and brown sugars, a little at a time, until the mixture is light and fluffy. Beat in the eggs 1 at a time, then mix in the vanilla and pumpkin puree.  Slowly beat the flour mixture into the batter in thirds. Stir in the chips.

Scoop the cookie dough by heaping tablespoons onto the prepared cookie sheets and bake for 15 to 20 minutes, or until the cookies are browned around the edges.  Adjust time for stoneware. Often people want their cooking a little softer, so they take them out while they are still soft in the middle.  Pumpkin cookies will be naturally softer and so you really do want to make sure they are cooked in the center.  Remove the cookie sheets from the oven and let them rest for 2 minutes. Take the cookies off with a spatula and cool them on wire racks.

Apple Cinnamon Oatmeal

My kids love the packets of apple cinnamon oatmeal, but I always feel funny about them.  Like, what is really in them?  And, oatmeal is so easy to make, does it really need a shortcut?  I get the whole traveling, camping utility of oatmeal packets, but I also like knowing I can spell everything in the food I serve my family.  So, I came up with this recipe as an alternative.  This is super quick and tastes so fresh.  Right away you'll notice the true apple taste is nothing like the store bought flavor.

Ingredients

2 Apples
2 Tbsp. Brown Sugar
3/4 tsp. Ground Cinnamon
1 C. Oatmeal
2 1/4 C. Water
2 pinches Salt

Instructions

Peel apples and grate them over a medium sauce pan.  Add brown sugar, cinnamon, oatmeal, water and salt and stir to combine.  Bring to a simmer and reduce heat to medium low.  Cook, stirring occasionally for 5 minutes or until water is absorbed.

Makes 2 large servings, 4 kid-size.


Saturday, October 18, 2014

Fried Eggs and Asparagus

Last weekend Scott and I were in a mountain town celebrating my birthday without kids.  We stopped into a place that is renowned for breakfast.  Admittedly, I wasn't in a great mood.  But, when a breakfast place can't get the coffee right, weeeeell...  I had considered just going for the bread pudding because, hey, it was my birthday and there are eggs in it, right?  I decided to behave and get the two eggs, bacon and potatoes instead, but when I asked the waitress to cook the eggs sunny-side-up, but make sure the white was cooked, while the yolk is runny...  (I know what you're thinking.  I am that person.)  Suffice it to say we had a disagreement about what can and cannot be done with eggs and before things escalated I settled on the bread pudding and decided to mooch bacon from the man who doesn't dine on the swine.

Growing up we called fried or sunny-side-up eggs "dip eggs" because they are so good to dip your toast in.  Remarkably many of my childhood memories center around soft-yolked eggs and eating them with family members and neighbors I love.  Without question they fit into my comfort food category.  These days they go by the name flat-eggy and my middle child gobbles them up.

Now, I love cooking - it's often the quiet part of my day when school is done and the kids are playing outside or entertaining themselves and I get to huddle in the kitchen and cook and putz around mostly in peace.  But there are some days when I am lacking the energy, time, or creativity to whip up something fancy.  On these days I love resorting to breakfast for dinner and one of the easiest and most balanced ways to do this is to cook up some veggies and throw a fried egg over the top of it and serve it with toast.  I love how the soft yolk runs over the veggies.  


Fried Eggs and Asparagus

Serves 2
This isn't so much a recipe as an idea - adjust the quantities of asparagus and eggs to suit your needs.  

1 bunch Asparagus
4 Eggs
1 Tbsp.(ish) Olive Oil
Salt and Pepper to Taste

Preheat oven to 400 degrees.

Rinse and trim the dry ends off the asparagus.  Place on a dishtowel and blot dry then transfer to a cookie sheet.  Pour olive oil over the asparagus and season with salt and pepper to taste.  Rotate the asparagus and make sure it is coated with the oil and seasoning and arrange in a single layer on the cookie sheet.  Roast for about 20 minutes, or until your desired tenderness.


Meanwhile, when you have about 5-10 minutes left on the asparagus, heat up a non-stick skillet over medium heat and spray with non-stick spray or a touch of oil.  Crack eggs into skillet and reduce heat to low.  Sprinkle with salt and pepper and allow them to slowly cook until they reach desired firmness.  As we now know, my preference is for them to have a runny yolk, but firm white that isn't burnt on the bottom, which can best be achieved by cooking them low and slow.

To serve: place 1/2 portion of asparagus on each plate and top with two eggs.  Don't forget the toast.


Wednesday, April 30, 2014

Cold Brewed Iced Coffee

It's been a couple years since I've started making iced coffee.  The truth is, this is my favorite way to drink coffee.  This recipe is adapted from one I found on pinterest.  Typically, I don't like sweetened coffee, but this cup is served best with a little milk and the little bit of sugar goes a long way.  You'll need a french press some means of filtering the coffee after it has finished the cold brew.  This is what we use: http://bodum.bodum.com/us/en-us/shop/detail/K11081-01/

Ingredients

1 1/4 C. Coarsely Ground Coffee (French Press or Percolator setting)
1/2 tsp. Ground Cinnamon
2 Tbsp. Brown Sugar
Cold Water (I just fill to the top of the french press, but I am assuming it would be somewhere around 40 oz)

Instructions

Guys, this is a really complicated process.
Place ground coffee in the bottom of the coffee press.  Add cinnamon, brown sugar and water.  Stir with wooden or plastic spoon (according to Bodum - do not use metal).
Place flat cover on (or cover with plunger kept up) and set on counter to brew for 4 hours (8 hours in fridge).
Press the plunger down.
Get a glass with ice (preferably something cute), pour coffee over leaving room for cream.  Add milk or cream.  Enjoy.
Store coffee in the refrigerator.


Tuesday, December 3, 2013

Kombucha Gingerale

It's been over a year since my dear friend Mandy was offering up some SCOBYs.  My husband has a little thing for kombucha, but I never got on the bandwagon until we started making our own.  I thought this might be a nice thing to do for him and this is the kind of thing I do.  So, I picked up the "Mothers" from her and set to work.  There's a lot of variation about making 'buch on the interwebs, so at some point you just have to take a stab at it and see how it goes.  After making it for over a year, we have found our method that is tried and true.

Update: we had some trouble after the hot some with imbalanced SCOBYs, so I've updated the recipe with less sugar and more flexibility.  5-days worked for us for a long time, but then just started not working anymore.  One of the most important things you can know about making kombucha is that it's not a static process.  Sometimes you'll need more time to ferment, sometimes less.  Sometimes more sugar, sometimes less.  Keep experimenting until you find the right balance for you!


For each SCOBY you will need:

  • 2 - 4.2 qt Hermetic Jars ($13 at Container Store) 
  • 1 C. White sugar (most of it converts during the process, but sugar is necessary) 
  • 5 Irish Breakfast tea bags (any black tea will do, research if you'd like to use green or herbal as I believe you need to modify the recipe.) 
  • Water 
  • SCOBY (symbiotic colony of bacteria and yeast)  or "Mother."  Search around because most kombucha makers have an excess.  I've been known to advertise them on freecycle and craigslist for free.  If you live in LA, contact me. I'll give you one.  
  • Ginger (lots) - we buy several pounds at a time from the chinese market.  It is fresher and much less expensive than the regular store.  Process it in the food processor, skin and all, until nicely chopped.  I use a mini loaf pan to mold the ginger into 1/4 C. portions and then freeze.  Once they are frozen I transfer them to a freezer safe container.  If you don't want to use ginger you can use anything that has sugar in it - fruit, juices, etc.  Although, I've heard citrus juices have extra conditions, so read up on it if you want to use citrus.
  • Rubber band 
  • Wooden spoon 
  • Mesh strainer 
  • Funnel
  • Iced Tea pitcher and extra glass or plastic jars for storage of finished kombucha.  Be cautious with glass containers as they have the ability to explode if they are stored too long.  


Directions for First Ferment:


  1. In your glass jar pour 1 C. sugar and 5 tea bags. 
  2. Boil water and pour into jar about 2 inches full so it is enough to dissolve sugar and steep tea. 
  3. Stir tea and sugar with a wooden spoon and let it sit for 10 minutes. 
  4. Fill up the rest of the jar with cool water and take tea bags out. 
  5. Place SCOBY on top. 
  6. Cover top of the jar with a dishcloth or cloth napkin and fasten with a rubber band.
  7. Set in a dark place at room temperature for 5 days (this is really a minimum time - most important is that you notice a sour, vinegar-like smell).  The balance of a SCOBY can be disrupted by a number of factors, so you will want to pay more attention to the color (golden brown) and smell than the number of days.  
  8. At the end of 5 days (or however long it takes to achieve your brew), prepare your second jar (repeating steps 1-4). 
  9. Transfer SCOBY from your 5-day batch into the newly prepared Jar.

This is what it should look like after 5 days.  The color will change to a light golden brown.  Notice all the things dangling from the SCOBY - this is good.


Directions for Second Ferment:

In your first jar with the completed first ferment add 1/2 c. grated ginger or other flavoring.
Seal the jar with the air-tight lid and let it sit for at least 2 days minimum - Usually we let ours sit for five days and do both steps together.

Directions for Storage:

This is what the 'buch looks like when the second ferment is done.
Strain out the fruit or whatever you added with a mesh drain and use funnel to transfer to storage bottles.  Store in a cool dark place until needed.  We usually keep an iced tea pitcher in the refrigerator and replenish with the stored 'buch as needed.
These are some of the jars we use for storage.  The Arizona Tea jar is awesome.

A word to the wise: 

Be careful when you open your air-tight container. The longer the kombucha sits, the fizzier it gets. I have had kombucha sprayed all over my ceiling twice.  Twice.  So, go slow when you open.

Another Word: 

A new SCOBY forms with each step in the process.  You can separate the SCOBY from the larger SCOBY in the first batch and share with friends. The ginger will usually get caught in the SCOBY from the second stage and should be discarded.  In the final storage containers there will be a very small SCOBY-like formation that can easily slip into your drink undetected.  I speak from experience when I say it can even be slurped up through a straw.  Do yourself a favor and look for it before you get it accidentally.  I call it a slug.  And, well, you can imagine what it's like to get that thing in your mouth.


Sunday, August 25, 2013

Panko Crusted Fish

I made this recipe ALL THE TIME until I started to write this post about 9 months ago.  It was at that point that I learned striped pangasius is most definitely not kosher.  This fish works so well with this recipe that I've been unmotivated to try something else.  Seeing as how I am an all-or-nothing kind of gal it's been taken out of the rotation.  Look, it's not like we keep a kosher house, but if I'm going to keep the hubby happy I can at least keep unkosher meat out of the house.  Boo for all the glorious recipes with pancetta that we are missing.  Anyway, this really is a great recipe and the kids gobble it up.  I suppose the kid-friendlyness of it is what kept me coming back to it - even though it meant a three step breading process.  I think you'll like it.

1/2 C. All-purpose flour
4 1/2 tsp. Chili powder
1 Kosher salt 1 tsp.
Black pepper
3 lg. Eggs, well beaten
1 1/2 C. Panko bread crumbs
1 lb Striped Pangasius, petrale sole or other thin white fish fillets (8 to 12 fillets), cleaned, skinned
Vegetable Oil for frying (I use grapeseed oil)
 
This is striped pangasius from Trader Joe's.  Very mild.


In a pie plate, baking dish or wide bowl, blend the flour, chili powder salt and pepper

Add eggs to another bowl and beat until well mixed.  Add panko to a third bowl.  Notice I have three separate forks for each bowl. 
Using your first fork spear the fish and place in the flour mixture and cover with flour.  Make sure it is coated, but you do not want blotches with extra coating.  Use the first fork to help shake the fish free of excess coating and place it in the second bowl with the beaten eggs.


Using the second fork, pick up the fish and coat it on both sides.  Before you transfer it to the panko let the excess egg drip off.  Use the second fork to place the fish in the panko.


Using the third fork, coat the fish with panko breadcrumbs.  You can stack the coated breadcrumbs on a plate as you finish the other pieces.


Heat vegetable oil in a 12-inch skillet over high heat.  Working in batches, add fish pieces.  Be careful not to over crowd the pan.  Cook fish for two minutes or until lightly browned.  Turn fish and cook for another minute or so until browned.  Keep cooked fish warm in an oven set to the lowest setting while you finish cooking the remaining fish.